We find the best way to learn something new is to jump in and put all fear aside.
Ok. This might not be the best solution for everyone or every situation, but with the USCCA Online Community Forum, we all have the ability to read and learn at our own pace. Whether you’re new to the self-defense realm, professional gunsmith or a self-defense lawyer, there are many topics to dive into.
The neat thing with this community, it’s open to everyone. Non-members can join the conversation and get real world knowledge and feedback from Firearm enthusiasts, Professionals and even corporate USCCA moderators to get answers quick. Take the time to create a profile today and join the conversation.
Not going to lie, we’re fairly new to the community forum, but it’s an awesome way to connect, learn, and build relationships.
The USCCA Community Forum has (4) four main categories: Training, Guns & Gear, Legal & Political and Miscellaneous. From there, find hundreds of different topics per category. The best way to find a certain topic is to use the search bar. Trust us, scrolling sucks, BUT one can find some interesting content/topics. If a topic cannot be found, create one.
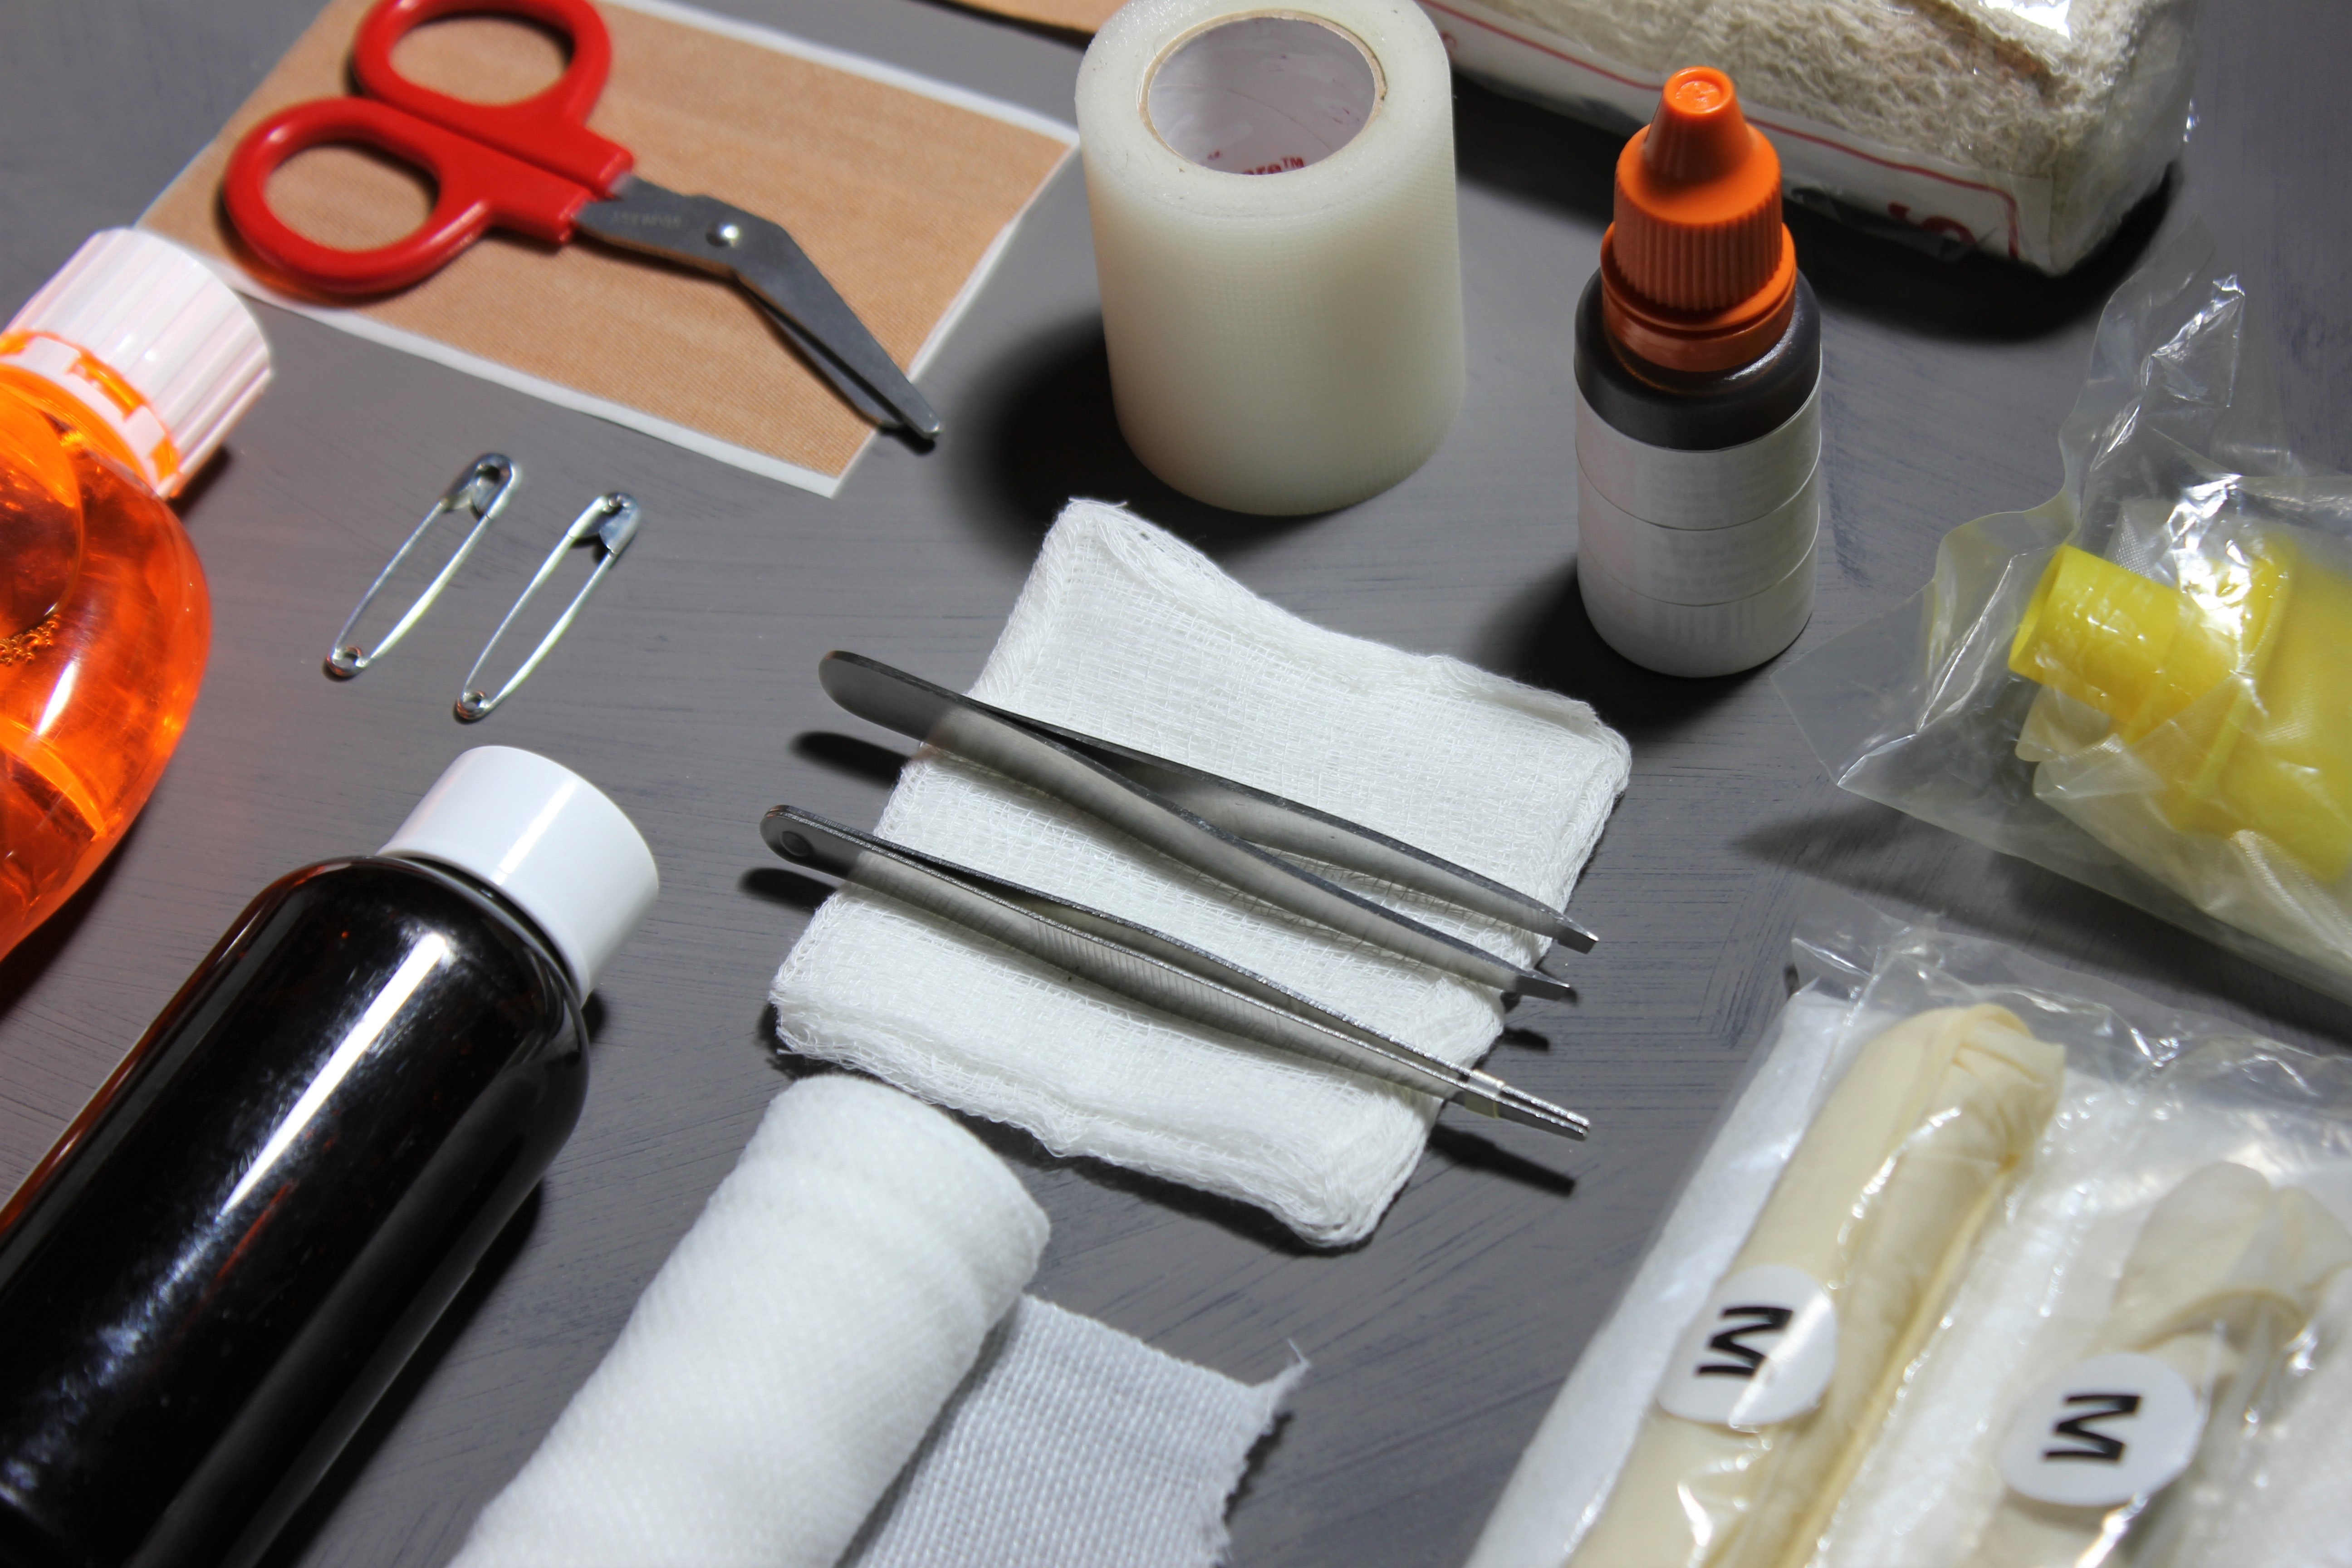
This may come as a surprise, but every single person reading this has access to this useful survival kit item. With no cheating, guess the item with the least amount of hints or clues. We have listed the top survival uses for this specific item below.
Tourniquet – By folding this item 2-3″ wide, wrap it 3-4″ above or below the wound, but not on a joint. A stick or pen can be used to tighten and if available, use the included jaw string to hold the stick or pen in place. (Take our Emergency First Aid course to learn more.)
Shower – By filling the item with clean water, tie it to a tree or fixture overhead. Take a pen or stick to poke a couple small holes to let water out. Can use rubber bands to temporarily close holes to preserve water.
Sucking Chest Wound Seal – If a puncture wound is showing signs of a sucking chest wound, simply cut the item into a 4″x4″ square, place over the wound and tape three sides with a waterproof tape. (Our Emergency First Aid course includes this.)
Waterproof Bandages – As introduced above, you can cut this item and use as a cover to protect any wound from further infection. Use waterproof tape to seal and protect the wound for an extended period of time.
Splint Tie – If we don’t have access to a SAM Splint, we can use a solid branch, tent poles, etc. Use this item to affix the splint and hold in place. (Take our Emergency First Aid course to learn more.)
Sling – By cutting this item in half, diagonally from corner to corner, we have access to 4 triangular splints. This also can be used for many other first aid emergencies.
Hypothermia Prevention – With this use, we want to rapidly increase the body temperature by insulting and using the heat the body produces. Remove damp or wet clothing and wrap skin with this item to insulate the body. This will help increase the body’s core temperature.
Insulation – Need a little extra warmth on a hike or camping trip? Use this item as long underwear to hold in precious body warmth. Affix with the use of waterproof tape.
Parka – This item can be cut and placed over the body to keep necessary gear dry. Keeping dry, especially for long, outdoor activities is crucial for warmth and to help limit many other injuries.
Gear Cover – Keeping a backpack with food rations or medical kits dry is critical. This could create a life or death situation real quick if critical gear is soaked. Use this to safety protect gear from the elements.
Shoe Covers – As stated above, for long hikes or travels on foot, we want to keep dry and most importantly our feet. Soaked feet, in this condition, can cause many injuries that will immobile or completely stop the avid outdoorsmen.
Pillow – Take this item and fill it with dry leaves or other soft, dry debris. It may not be a MyPillow, but it will keep you comfy and assist in being well rested in a harsh environment.
Clothes Washer – Fill this item with non-potable water and a detergent/soap/disinfectant wipes on hand. Shake the bag and physically scrub clothes in bag to agitate the water. Rinse clothes and hang to dry.
Floatation Device – Save crucial lung muscles and whip this item in a figure 8 motion, open side forward, and collect air. Close by tying the end. This will help keep a single person afloat. Be sure to not puncture or rupture during use. A pair of pants can also be used as an emergency floatation device.
Fish Netting – Take a pen or stick and puncture holes about 3 to 4 inches apart so water can easily flow through, but doesn’t take away from the structural integrity.
Food Bowl – If there is a stocking cap or other hat accessible, use this item as a liner.
Trail Marker – At some point, going away from camp to find resources will be crucial. If needed, use this item to flag or mark so finding the way back will be an effortless task.
SOS Signal or Flag – As a last resort, use this item to spell out SOS or as a flag to signal aircraft or any passing individuals on higher terrain. This item can also be used to block wind if a signal fire needs to be started.
Going back to basics, regardless of industry, is a great way to support a foundation for further growth. This is no different for firearms. For this specific post, we are going to take a deeper dive into the firearm safety rules, explain the WHY and provide detailed scenarios of each.
Take a second to read the rules below and understand that they all promote safety. They also support one another and remember that no one rule is more important than another.
Treat Every Firearm As If It Were Loaded
Is a water gun, dart gun or toy gun considered a “firearm”? This debate can go back and forth for days and can get very heated for parents on all spectrums. Especially when we consider children and firearms, we want to build muscle memory for safety. These toys can be fun (and they are), but they can also create an arena for complacency.
Muscle memory can take up to 2 to 4 weeks to establish, but on-going refresher is needed to maintain memory. Firearms training is physically and mentally challenging. What happens to human muscle mass if conditioned at the gym for 4 weeks straight and then stopped for 1 month? According to healthline.com, we can see diminished performance just after 4 weeks of not working out.
All of these safety rules require motor skills and motor skills are perishable, meaning that to maintain or improve firearm skills takes continued, on-going practice.
A simple maneuver, such as properly retrieving a firearm laid on the nightstand in the dark can create many safety concerns or complications. Is it pointed in a safe direction? Is the safety on or not? Are there items blocking it? Is the firearm in a locked safe? Can the firearm even be identified in the dark? Is the firearm equipped with night sights and/or light? Regardless, there are many questions to consider beyond the basic safety rules. But let’s not get ahead of ourselves. Let’s cover the 4 basic firearm safety rules.
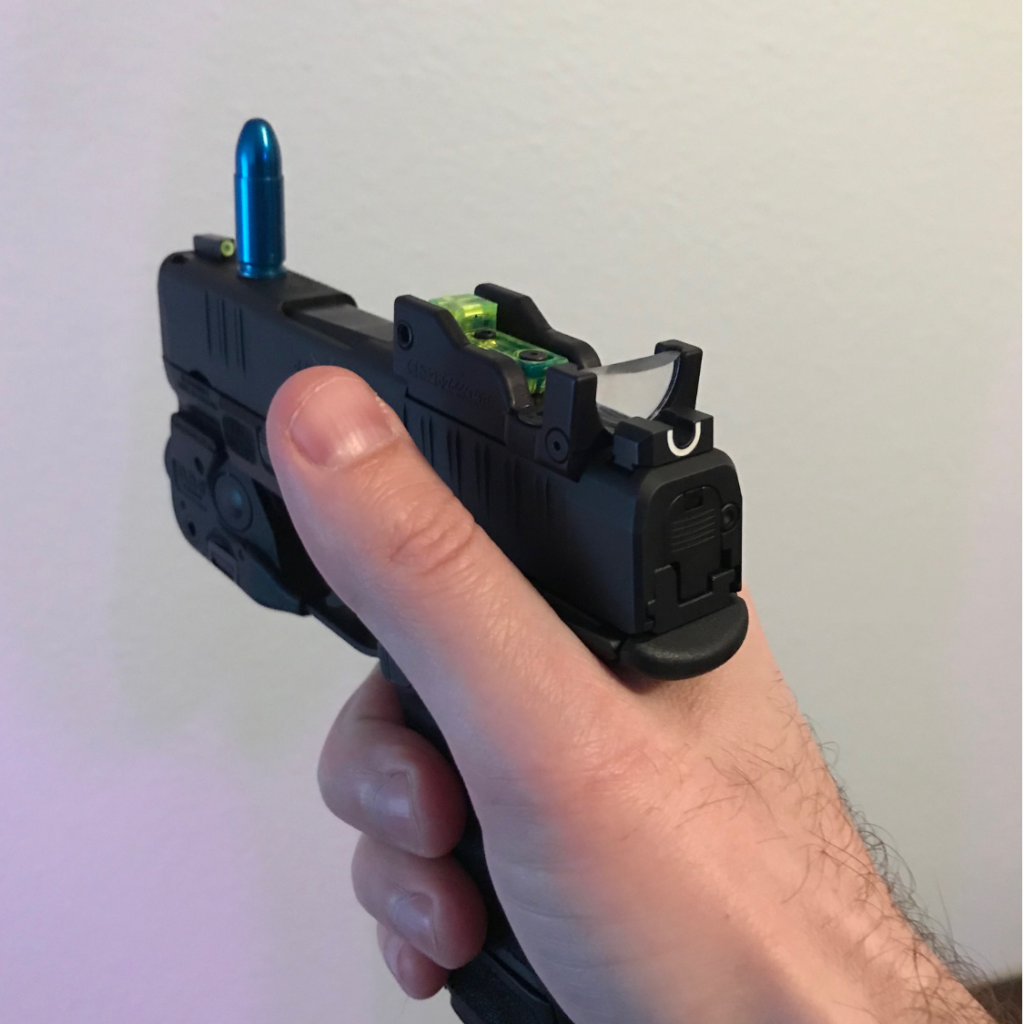
Never Point the Firearm at Anything You Are Not Willing to Destroy
As mentioned above, treating all firearms as if they were loaded. This safety rule is compounded by focusing on muzzle control. The muzzle is the front part of the barrel and for on-going practice, think of a high-intensity laser coming out the front of the firearm. It would ultimately destroy anything in its path. Especially for beginners, having a laser or light on the front of the firearm as a constant reminder during practice may help amplify that muscle memory.
This is especially important when holstering, presenting, firing, maneuvering, SUL/Temple Index stances, etc. The more motion we incorporate, the higher probability of complacency in muzzle control.
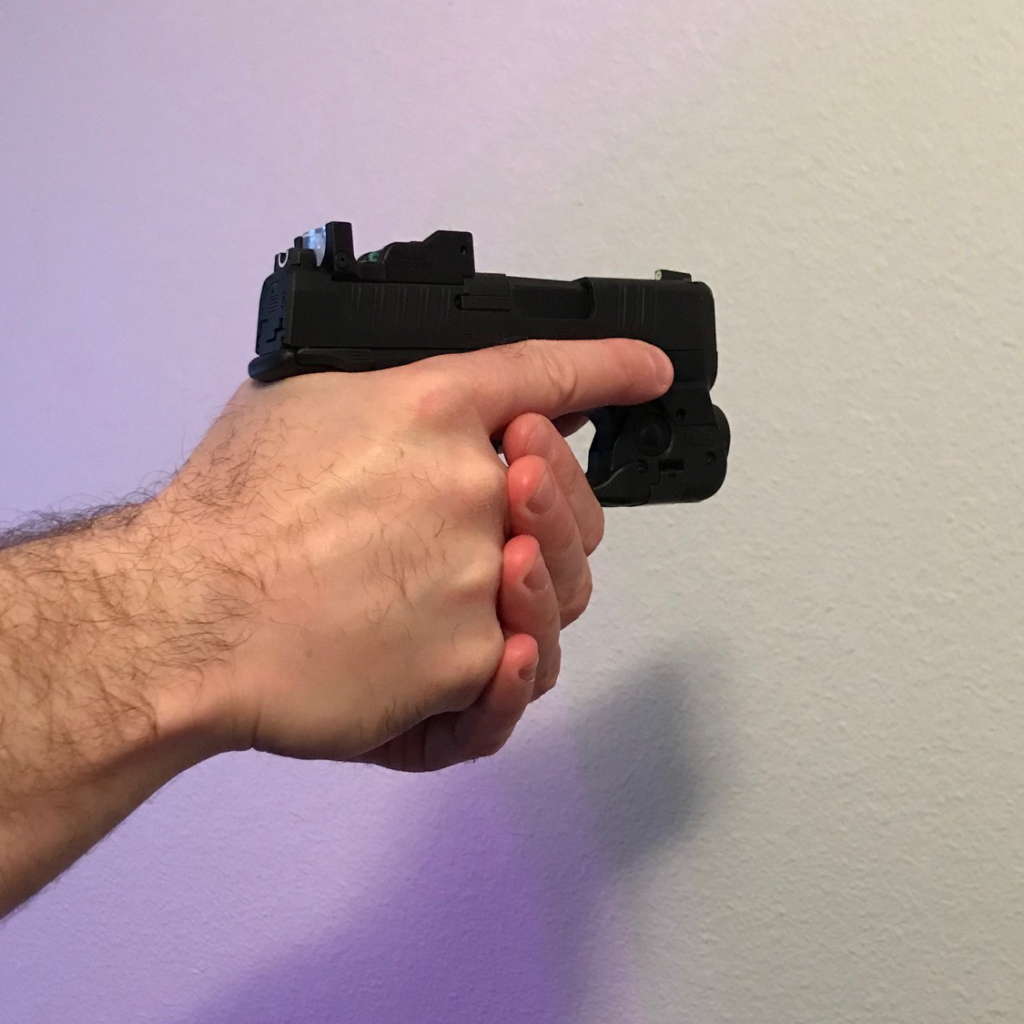
Keep Your Finger Off the Trigger Until Ready to Fire
This rule can be a bit misleading and for safety reasons, we need to add “Off the Trigger Guard” as well. During many maneuvers, the Trigger Finger should be above the guard and touching the slide.
During movement, our grip shouldn’t be compromised, but in real life situations, things will never be perfect and that “perfect grip” will get lost. Reassessing grip position with the Trigger Finger on the slide won’t compromise safety. This safety rule is also imperative during the holstering process. Physically look and slow down. We have all the time in the world to holster the firearm.
Be Sure of Your Target and What is Behind It
Last, but not least we need to focus on the target and what is behind it. All these rules apply to Dry and Live Fire and when setting up targets for in-home, Dry Fire we always make sure the chamber, magazine well and magazines are clear, as well as removing all live ammunition from the room. What’s even as critical is setting the targets up in a safe direction.
What’s in front of the target? What’s on the backside of the wall? Are neighbors living close or on the other side of the wall? Are there other potential safety hazards, for instance: propane tanks or other flammable/explosive materials?
Have questions about any of these concepts? Contact us HERE and would love to help.
Before we start any dry fire practice, focus on safety first. Please remove ALL ammunition from the room and place in a safe, dry and cool place. Make sure firearm(s), mag well(s) and magazine(s) have all been checked/cleared of ALL ammunition. When aiming, make sure it’s in a safe direction and nothing you intend to destroy is in the firearms path. This includes checking the other side of the wall and beyond.
“Practice doesn’t make perfect. Only perfect practice makes perfect.” -Vince Lombardi
Dry fire practice helps establish finger dexterity, muscle memory, decreased anxiety, decreased cost w/o the use of ammunition, increased accuracy and many other positive benefits.
Now on to the dry firing drills.
1) Simple Dry Fire
For this drill we’re simply focusing on basic fundamentals of placing the sights on target, proper grip and trigger press. Try standing in front of white wall and simply get into position. Wrack the slide back and with proper grip, get the sights aligned and slowly pull the trigger through the wall (the resistance point of the trigger press). Repeat this process. Even the most advanced marksmen take the time to simply dry fire.
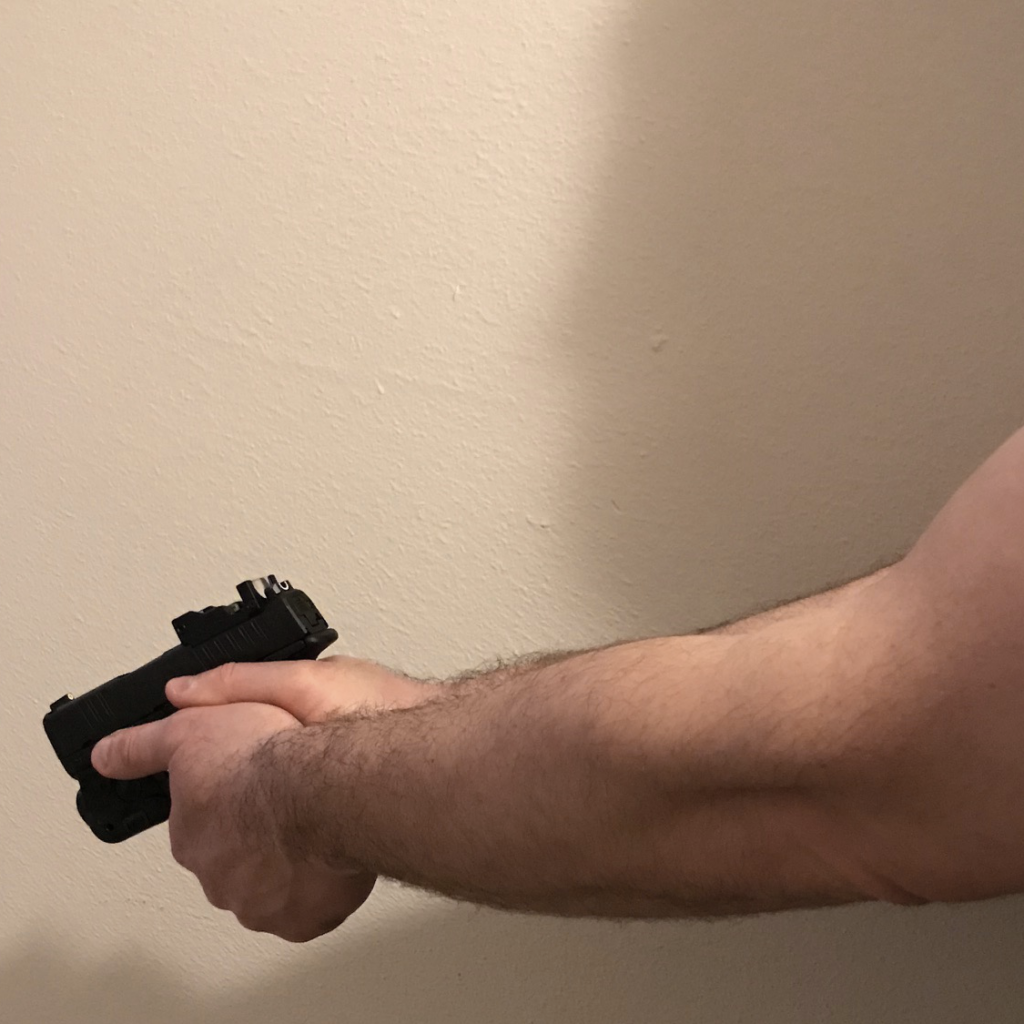
2) Balace for Trigger Control
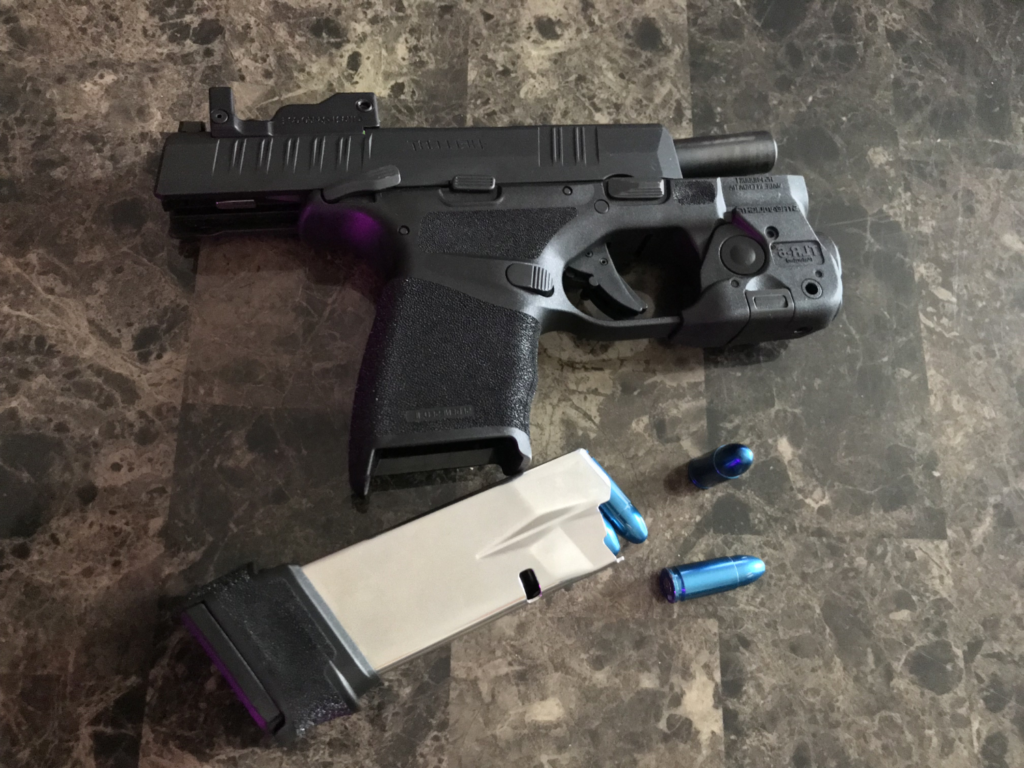
This drill can be completed with the use of a thumb tack, coin, empty casing or SNAP cap. We would suggest using a SNAP cap because they should already be available during this dry fire exercise. Next, grab one of these items and balance it on top of the slide. Now with proper position and grip, pull the trigger slow and steady without dropping the item balancing on the slide. Repeat as necessary. (Note: Had to take a picture with the other hand! It took more than a few tries.) This is especially helpful for new firearm owners that may also need to build finger dexterity or upper body strength. Note: This is also a good indicator if the weight of the firearm exceeds the users limitation. Getting properly fitted for a CCW (Concealed Carry Weapon) should also be done with a Certified Firearm Instructor.
3) The First Shot
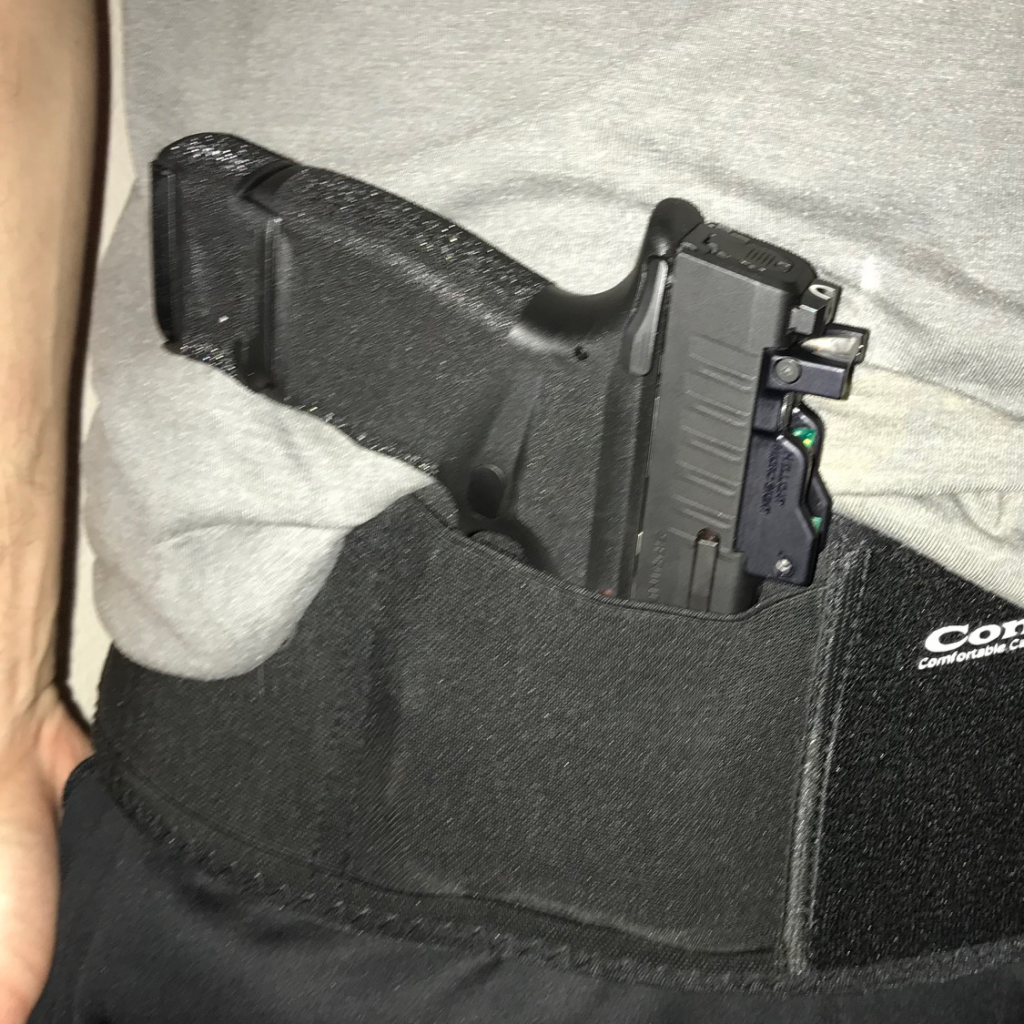
Concealed Carry means that the firearm is hidden on body or off body. There are countless options and finding a holster that fits comfortably is key for this exercise. The First Shot is exactly what it means. Practice drawing, presenting and firing the firearm from the concealed location in a slow, but steady pace. Don’t focus on speed. Slow is smooth and smooth is fast! In a self-defense situation, always have the first shot!
4) Multiple Target Transition
This exercise will need two targets and placed about 3 feet apart on the wall. Starting from a low ready position, aim at the first target and pull the trigger. Then quickly transition to the second target, get the sight dialed in and pull the trigger again. Building the muscle memory with target acquisition is the main focus in this drill. Remember, recoil will affect this exercise and once comfortable, transition to live fire. For the sake of saving money on ammunition though, dry firing is always a great option.
5) Presentation
The Presentation Drill has been included in earlier exercises, but this is simplified to help build important muscle memory. Practice drawing from the concealed carry position, presenting the firearm with proper grip and aligning the sights in a slow, but steady pace. Again, don’t focus on speed. Slow is smooth and smooth is fast!
Have other dry firing drills that are a favorite? Submit them in the comment section below.
From working in the shop to out on the range, safety measures take all forms. To protecting toes, fingers, limbs, center-of-mass “vital organs” or the cranium (skull), there are things we can do to limit dangerous exposure to the elements.
Hearing is just one of these pieces or “senses” that need protection. Especially for the shooting sports and continued training for defensive purposes. The instant percussion or sound from a round going off in a firearm can cause immediate ringing in the unprotected ear.
According to HealthyHearing.com, “A gunshot produces a loud burst of sound, causing a concussive energy that rattles the eardrum, the little bones in the inner ear and the cochlea, a fluid-filled, snail-shaped organ with thousands of tiny hair-like structures that convert sounds from the outside world into electrical impulses the brain can understand.”
Shooter’s Ear is another topic some have heard (There is a dad joke in “hear” somewhere). On a serious note, this is where the ear opposite to the firearm is affected. “The shooting arm shoulder helps shield the blast from hitting the ear full force, causing more damage to hearing on the opposite side.”
What can we use to combat hearing loss, ear-ringing or “shooter’s ear” and limit concussive energy exposure? These are options we use and recommend:
Sordin Supreme PRO X
Sordin (Military Grade) are honestly the best type of hearing protection for the avid range shooter or the individual succumbing to constant, loud noise in the workplace. The dual-microphone and multiple amplification settings put Sordin Supreme PRO X on the top of the list.
These are a newer style of ear protection that also include bluetooth capabilities. Lighter to carry and customizable ear pieces, AXIL GS Extreme Ear Buds are a great option for the individual in warmer climates and constantly on the move. Require agility for tactical training or in the workplace? Pick up the AXIL GS Extreme Ear Buds.
3M Peltor X1A Over-the-Head Ear Muffs
Simple, yet effective. These 3M Peltor X1A‘s don’t break the bank! This option is great for a backup, live fire class, or when getting down and dirty in the trenches. Long day at the range or in a noisy environment all day? Couple these bad boys with the Corded Ear Plugs.
Corded Ear Plugs
When all else fails or in a pinch for time/money, these silicon, corded and reusable ear plugs are last, but definitely not least. When out on the range or in a construction environment, the last thing we want is to be searching for ear protection. Lost earbuds in a pocket filled with tools/debris? Don’t risk loosing ear protection and having to scrounge up another pair. The Corded Ear Plugs will easily stow around your neck.
According to U.S. News, over 5.1 million second amendment supporters became new gun owners between Jan 2020 and April 2021. The “pandemic” and the surge of crime, from defunding the police, was a major contributor. Also, U.S. Governmental overreach was witnessed by every-single-citizen on a massive level. The federal government down to our local communities, families and small businesses were impacted financially, physically and mentally.
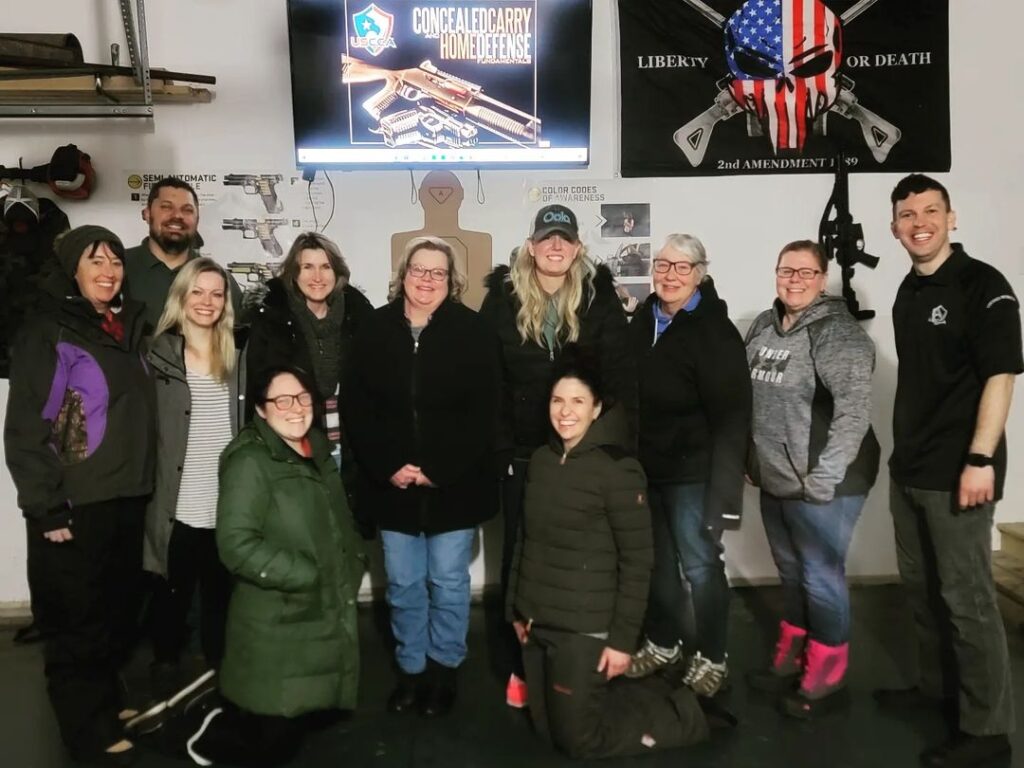
Above all this, Nomadlund Outfitters had a chance to be a part of an amazing movement. All thanks to partnering with Pivotal Defense and the amazing women taking part in a private, Permit to Carry and Self-Defense course in Delano, Minnesota.
Secondly, we all fear the unknown and the same is true for firearm ownership. For example, the fear of walking to the car at night can be diminished through proper protection. What bridges the gap between fear and being a responsible firearm owner is education.
Certainly, the biggest eye opener that one of our students, in her 60’s, joined us with such anxiety and shaking from the nerves. She never held or shot a gun, ever. This type of nervousness is honestly expected from all new gun owners.
Most importantly, as the class progressed (with a lot of laughs) , the nervousness subsided. Yes, there’s a strict curriculum we follow, but having the private open-discussion, in a stress free environment, is key for this amazing segment of new gun owners, women.
In conclusion, let’s take a second to celebrate the movement of women empowerment through education and self-defense.
Want to schedule a personalized, All Women Permit to Carry event or one-on-one session?
My name is Cory Ley, Founder of Nomadlund Outfitters and Certified Firearms Instructor with USCCA. As a USAF Vet (2x Afghan Vet), supporting/defending our constitutional rights are first and foremost. Also, living by three (3) Core Values:
1) Integrity First
2) Service Before Self
3) Excellence In All We Do
At Nomadlund, our beliefs hold true to these basic principles. We are a new and upcoming outfitter in Central Minnesota that’s focusing our initial efforts on Permit to Carry, Home Defense, Self-Defense, Emergency First Aid and other courses for Minnesota residents. As we continue to grow, we’ll be offering outdoor rental equipment, (CPR) Cardiopulmonary Resuscitation Certification courses, attaining our (FFL) Federal Firearms License and additional certifications to fully support our customers. Our goal is to offer an array of high-quality, outdoor, survival, tactical products/services online and in MN, USA.